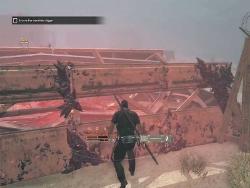
In Chapter 7: Secure Wormhole Digger Walkthrough of Metal Gear Survive, AI Virgil will give you the location of a digger, you have to reach there and extract it to install it at Base Camp.
In Chapter 6 after getting the memory board the AI will tell you about a new massive creature Lord of the Dust. With that, the AI also talk about Wormhole Digger. In Chapter 7, you will have to secure it. You will also learn about Wormhole Extraction Device. This device will help you to extract or move items that have crystals on it. Also, the main objective of Chapter 7 is to extract Wormhole Digger device, that will be installed at the Base Camp so that all can return home.
Secure the Wormhole Digger Walkthrough
Before starting you can go through Construction Terminal and setup your base a bit. You can add some new facilities like Advance Weapon Workbench or anything that you find will be useful for you in the upcoming missions. Under Buildings > Resource Facilities you can start Farming. By adding them you will have a regular food supply. At one side of your base, you can add a potato farm that requires 1 Potato, 5 Clay, 5 Wood and 200 KUB. If you have these items, you can set up a Food Resource for you. Repair your weapons and gears once and head to the main objective. You can also craft a Crowbar which his very good against wild animals and breaking objects compare to a machete. Look at the map and you will see the location on the extreme south.
Now it is a long traveling, as there is no Wormhole Transporter available, you have to feed yourself nicely. Look for animals around and craft enough food first. Also, go to the medicine section and get necessary supplies first. Check your Hunger and Thirst Level. In between, you can see Blue Circles which are more like a side mission. You can play them also if you want or else you can go to the main mission. In between while moving you will find tanks, there are jackals around and a container in the area. By opening that you can get a Survival Spear Recipe. Once you reach near the yellow circle, you will see a lot of Wanderer’s and the wall of Dust. There will be more ahead, so you have to plan your attack. A simple way is to build a fence around and lure them towards you or you can go into stealth mode by killing them from backside one by one.
Again there will be more when you are near the digger. Find a good spot to stand like the crashed truck on the left, stand on it and use your spear to attack the Wanderer’s. This will save your time and health. It won’t be easy to access to the digger unless you kill all the Wanderer’s in the area. To access the digger you will have to walk to the extreme left end and look for a barricade with crystals on it, use the Wormhole Extraction Device to clear the blockage. Once you are in, check cabins around, in the second from left you can find a Container. You will get a recipe for Flame Arrow, Small Left Gadget Sling, and Portable Shovel. After checking the cabins go towards the Wormhole Digger and gather it. Just on the right side, there is a transporter, you have to activate it and defend it for 1.30 minutes. So first block the area from where you entered or else it will be tough to handle the horde of Wanderers. Lock the access with fences and Sandbag footholds. Then activate the transporter and defend it.
Once the Wormhole Transporter is activated, return to the base camp. This completes the chapter. In the next Walkthrough of Chapter 8, you will have to activate the Wormhole Digger. For more updates and tips on the game, you can also read our Metal Gear Survive Wiki Guide.


Published: Feb 24, 2018 07:33 am