Berlin is the challenging location in Hitman 3 to complete the Sniper Assassin challenge. While you still only need to kill five targets, the fact that most of them are indoors in areas you’ll be spotted makes this almost impossible. In this guide, we’ll show you how to complete this challenge with a rank of Silent Assassin to boot.
Loadout
The loadout for completing the Sniper Assassin challenge in Berlin has three main requirements. The first is a sniper rifle in a briefcase. The sniper rifle must be silenced for this route to work. You can pick up the one we’re using, as well as The White Shadow disguise, by completing The Proloff Parable Escalation. You will also need the coin as a distraction.

Finally, you must use the Radio Tower as your starting location. This is the only way to get both a sniper rifle and a briefcase into the location. The Radio Tower is unlocked at mastery level eight for Berlin. If you’ve yet to unlock it, complete some Contracts set in the location, such as The Lesley Celebration, and attempt this challenge when you have the required starting location.
Step 1: Get into the club
The first thing you need to do is head inside the club. If you have the shortcut that allows you to get in through the back of the main entrance, then you can use this. We’ll cover an alternative method for those who don’t have it.
Head straight for the club and run through the queue of people waiting to get in. Make sure you head to the left, towards the guards.

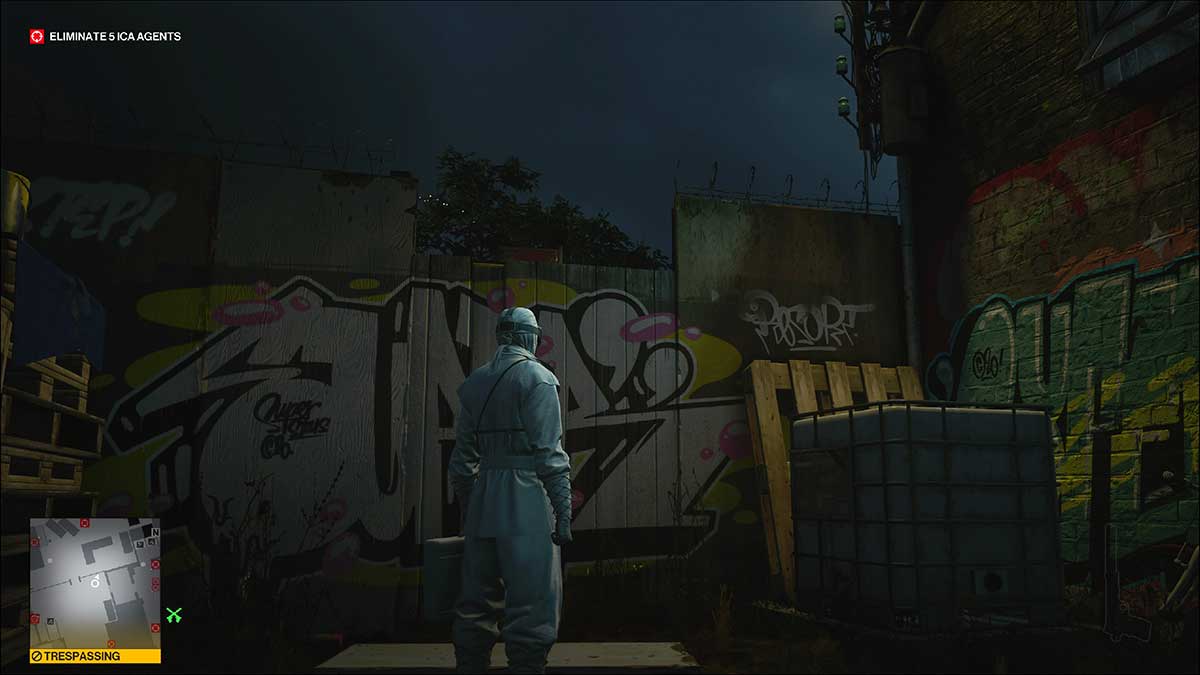
Keep running forward past the left-hand side of the van in the image above. Beyond, two guards are blocking the road ahead. Run to the right of them and follow the wall to the corner. Once you’re there, throw your case over and vault over after it.

Below is a map reference for this wall.

Once you’re over, turn left and get out of the concrete area. You need to run across the road to the grass and bushes. Follow the road right, but be sure to remain hidden. You can crouch behind the low wall here and keep moving through the bushes ahead when you reach them.

At the end of this section of bushes, turn right and follow the bushes all the way down. They lead to a gap in the fence that you can use to get past the guards on your right.

Once you’re through the bushes, keep moving forward. You’ll see a camera to your right. Shoot it out. You need to go through its view to get into the club.

To the left of this camera in the image above is another wall you need to vault over. You’ll need to throw your briefcase over first, of course. Make sure that you don’t throw it too far. The briefcase could end up on top of a port-a-loo that we spent a long time discovering that you can’t retrieve it from. If it does, restart the mission.

After vaulting the wall, you’re into the club. Head right and go across the bridge. This leads you to the outdoor bar, and from here, you can get inside. You’re not killing anyone just yet, though. Get into the main club and go down to the bottom floor.
Step 2: Finding your personal sniper nest
The basement floor of the club is packed with people. Head to the back, opposite the stairs, and the right-hand corner. There’s a door here marked as “Tech Only.”

Below is a map reference for this door.

You need to go inside and turn left immediately. You’ll be trespassing once you’re in, so get out of the view of any clubbers as soon as possible.
Once you’re in, find the ladder leading to the top of the DJ booth. Now you need to take your sniper rifle out of its case and climb up.

At this point, you need to climb onto the vents up here. Head through the gap and follow it around to the right.

The location you need to stop at is just between the heavily guarded door and the security room.

Below is a map reference for the point at which you should be waiting.

After you’ve waited for a little while, a target will come down here with a bodyguard. They’ll first go to the left of the opening, then move right towards the security room.
As the target goes through the door to the next area, flip a coin just inside the opening they came through as they walked down the stairs. You must wait until the target is through the door. If not, there’s a glitch in the game that causes the target to be the one to investigate, not the bodyguard.

The target will move off as the bodyguard investigates. When the coast is clear, drop down and take out the bodyguard. You can store his body in the crate inside this area.

Now you need to go through the double doors underneath the camera in this corridor.

Once you’re inside, head down the corridor and left of where the NPC you can see talking is standing. This takes you to the back of the room. Find the gramophone and turn it on. Leave it playing long enough for the NPC to notice it and come to investigate. Make sure you turn it off before they come over, though.

Wait around the corner for the NPC to approach, then take him out and hide him in the locker. There is also a body through the door back here with a container. Now you need to wait for the two other NPCs in this room to leave. It should take 60 seconds or so for them to do so.

Once they’re gone, pick up the phonebook that the NPC you subdued will have dropped. Now move to the phone on the bar.

This will give you a prompt to schedule a meeting. Once you’ve done this, five targets will begin making their way to this room. Make sure you’re ready.
Step 3: Kill the targets
The five targets will arrive one after the other, so you need to kill them quickly if you want to avoid having any issues with this challenge. Make your way to the main seating area where the NPCs were gathered as you entered this room and face the door you entered through.
The first target will come in through the door to your left. Kill them with the sniper rifle and drag their body to the locker. You should have just enough time to do this before your next two targets arrive.

As you hide the body, two targets will enter the room through the same door you did. Make your way down to the area and shoot them with the sniper rifle. The second target might start to fire their gun, but it’s silenced so that it won’t draw any unwanted attention.
The fourth target will enter through the same door as the first on your right. You can shoot them and leave their body while you wait for the last one.
The fifth target will come in through the left door. There’s a chance that they’ll see you take out the second and third targets. If they do, they’ll walk into the room ready for a fight. Make sure you shoot them before they kick up too much of a fuss.

We advise that you hide all the bodies. Once you’ve used up all the containers, hide them in the room at the back, near the gramophone.
Step 4: Exit
The best exit from this room is the drainpipe in the room at the back. This is where you should have hidden a few bodies.

Below is a map reference for this drainpipe.

Get up this drainpipe and up the stairs. After a few flights, you’ll see a shortcut door. Luckily, this opens from the inside, so you can use it to get outside again.

Head left once you’re outside, and you should recognize where you are. This is the area you came through to get into the club.

Make your way back out of here the same way that you came. Make sure that you drop your sniper rifle somewhere discreet before you’re seen in public. You can use any exit you want to end the mission, but the UFO one is the best.




Published: Mar 8, 2021 09:38 am