
The Eastern Wetlands (E3) in The Talos Principle 2 introduces the Inverter as the main item you’ll need to incorporate into your solutions. One of the first tests where you could get slightly stumped is with Puzzle 5 – Imprisoned.
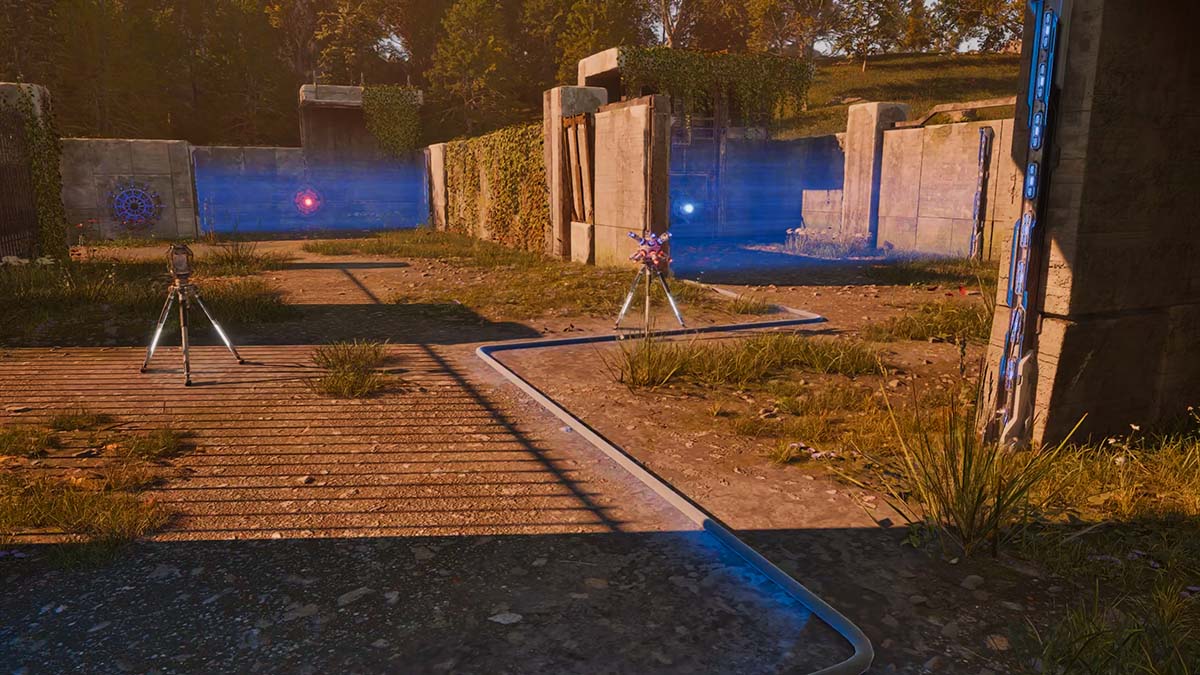
In the Imprisoned puzzle, you’ll have to use a blue and red transmitter beam to access the progress wheel behind a locked gate. The problem is there are two receivers you need to connect to a blue beam, but the transmitters are also behind gates, and you don’t have a lot of items to work with. There are a few steps to getting this one solved, but once you do, it’ll make things a lot easier moving forward in later challenges. Here is a walkthrough for how to complete Imprisoned – E3 Puzzle 5 in The Talos Principle 2.
Related: How To Solve ‘High Ground’ Puzzle In The Talos Principle 2 (N1 Puzzle 4)
How To Complete Imprisoned – E3 Puzzle 5
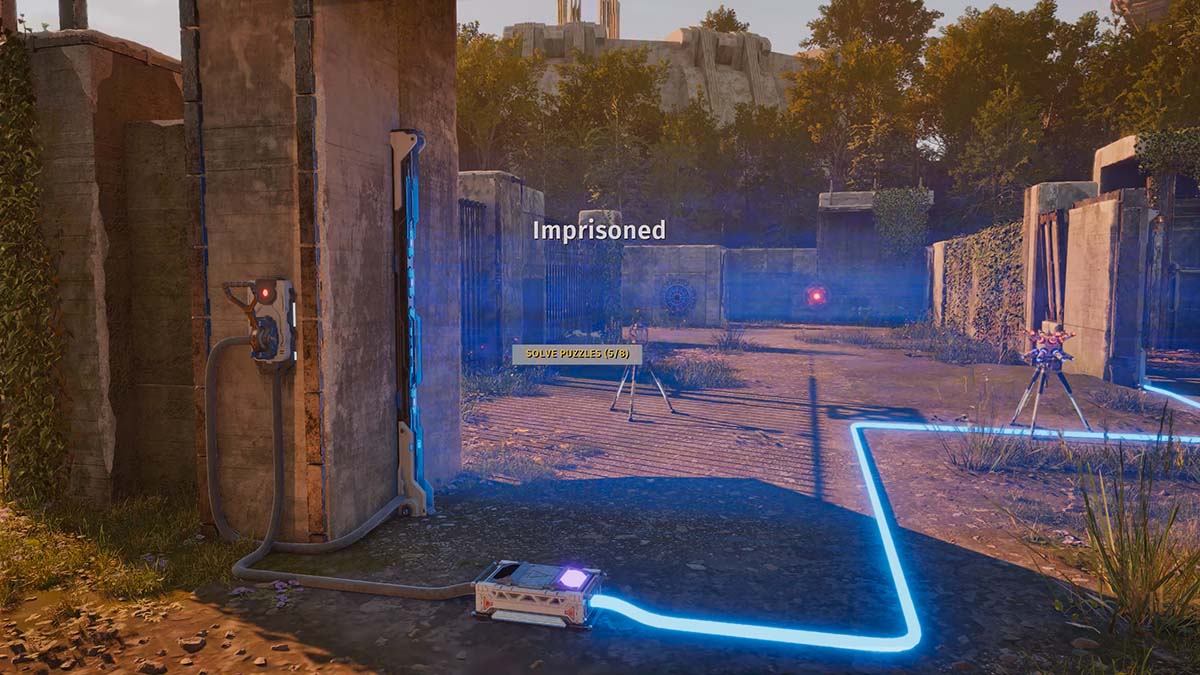
Imprisoned is Puzzle 5 in the Eastern Wetlands (E3) region in The Talos Principle 2. With this problem, you’ll need to make use of the Inverter, which takes the incoming beam and switches it to the opposite color. That means if a blue beam is the input, it will output a red beam, and vice versa. I found Imprisoned to be one of the first puzzles to make me scratch my head, but after I walked away for a few minutes and returned, I realized what I had been doing wrong. This set of steps will help you out if you’ve also found yourself a little stuck.
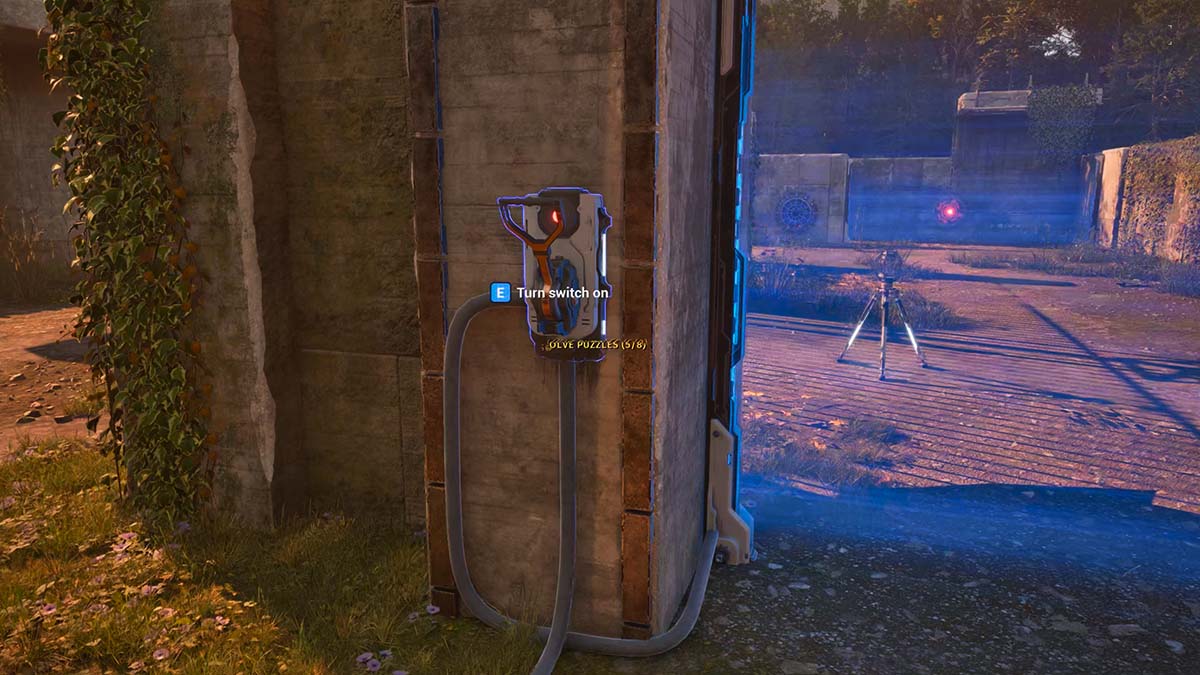
First up, as soon as you walk into Imprisoned, you’ll see a switch on the pillar to the left; turn this On. It will disable the Energy Gate directly in front of you, but the switch will also enable another Energy Gate in the next area – we’ll come back to that later. In front of you, there will be a Connector and Inverter just through the door.

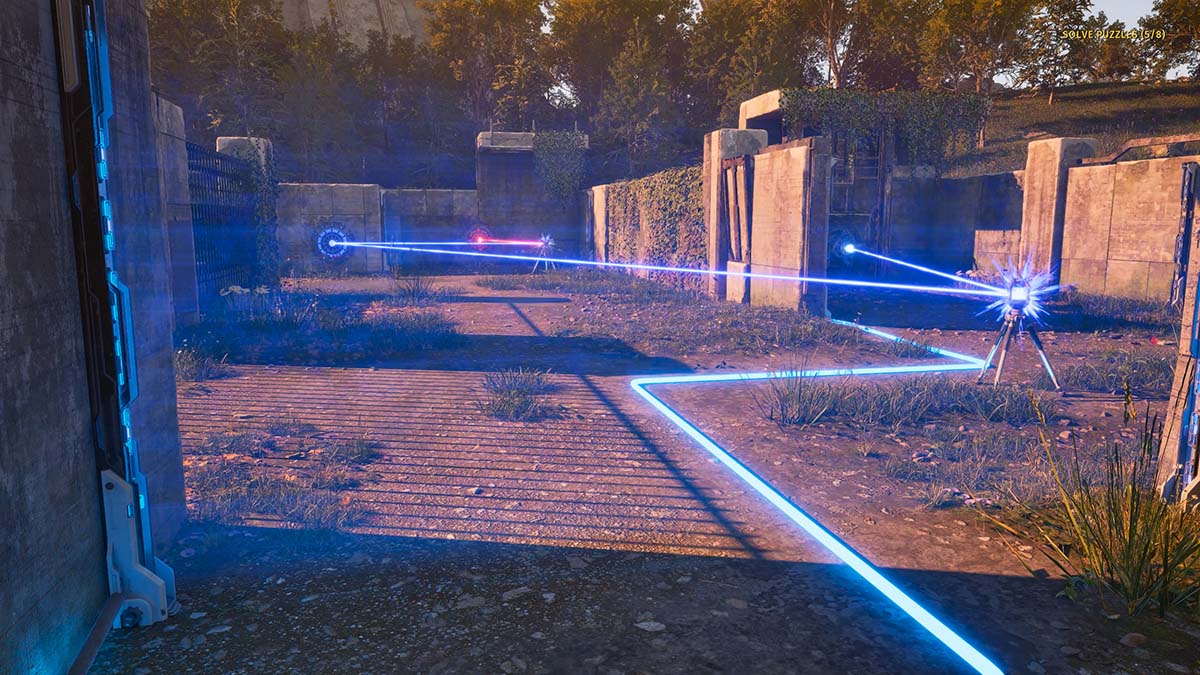
Pick up the Connector and walk toward the blue Transmitter on the right – it is behind a closed Energy Gate, but you can still attach to it. Further along the back wall, you’ll see yet another closed Energy Gate, but this one has a red Transmitter inside. Just to the left of this gate is a blue Receiver, which powers that Energy Gate, and this Receiver is where you want to attach the Connector. When both are attached, place the Connector on the ground in line with the Transmitter and Receiver.
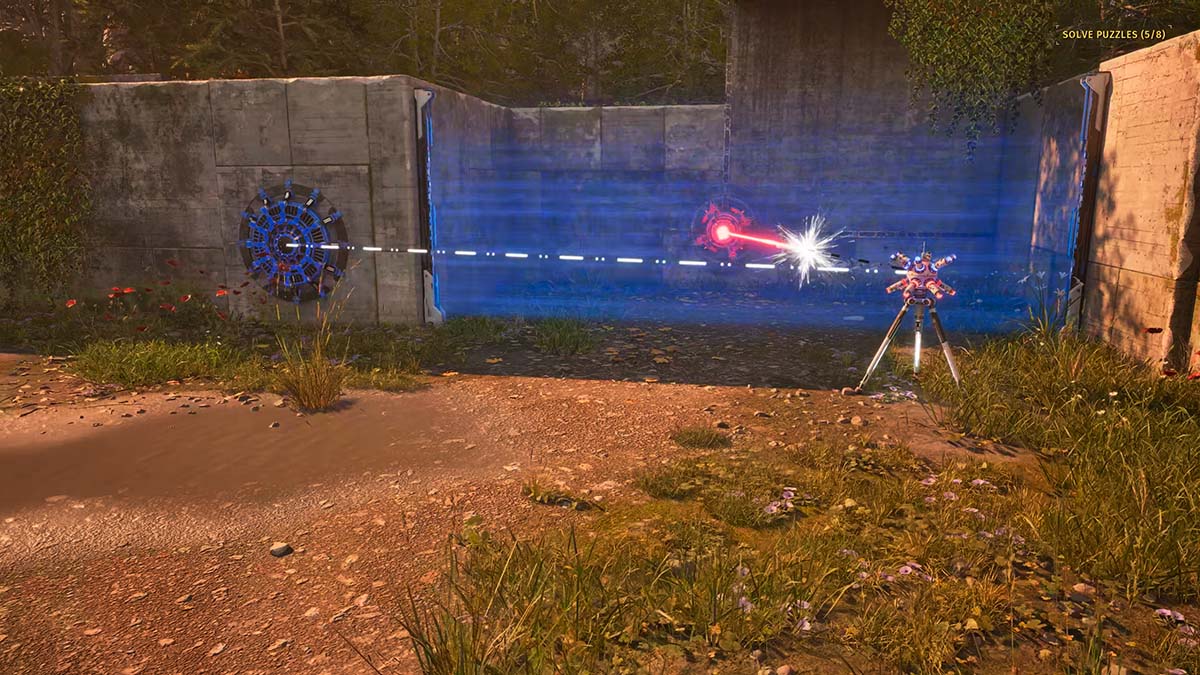
Once that is done, pick up the Inverter and head to the back Energy Gate with the red Transmitter. Try to get as far right as you can, then connect the Inverter to the red Transmitter and the blue Reciever next to the gate. Put this one on the ground, and that will complete the first big step.
You’ll notice that nothing is happening at the moment because the Energy Gate is blocking both Transmitters. However, if you go back to the beginning of the puzzle where the Switch was and turn this Off, it will disable the Energy Gate with the blue Transmitter. Do this, then wait for the blue Reciever to fully charge, and that will then cause the back Energy Gate to turn off and the red Transmitter to start operating. You’re now safe to turn the pillar Switch On again.
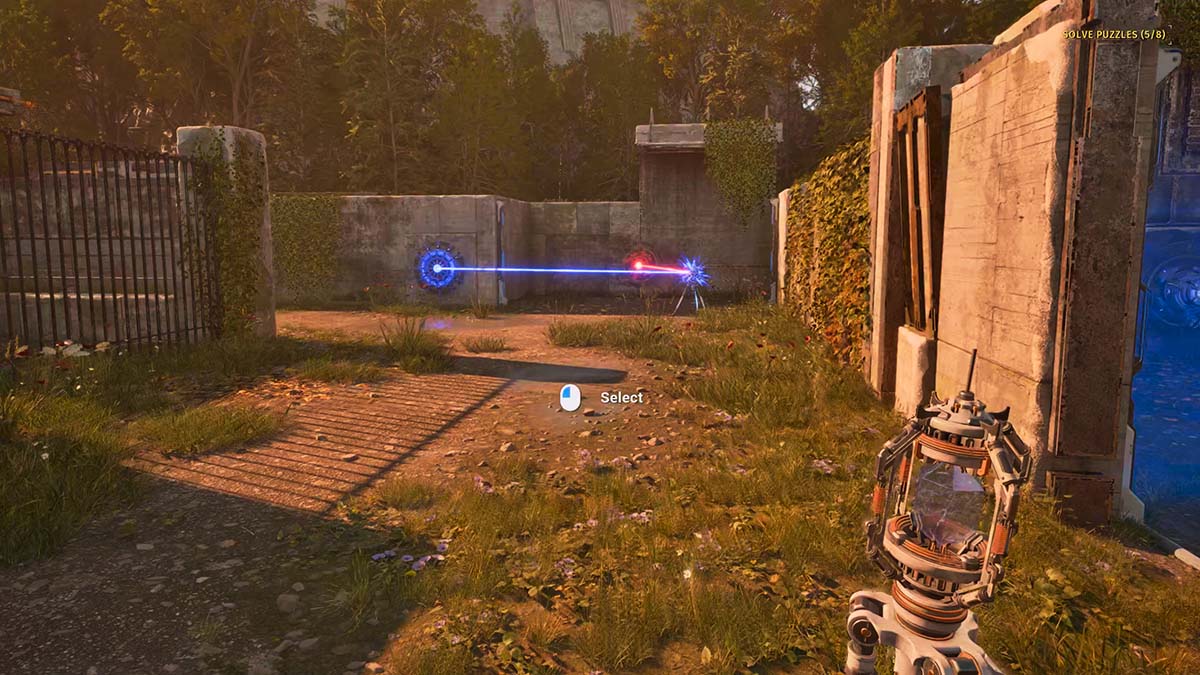
This red Transmitter is now sending a red beam to the Inverter, which in turn inverts the red beam to a blue beam and then starts a self-sustaining loop using the blue Receiver. It’s a great moment once you’ve realized how this is working.
Related: The Talos Principle 2: DLSS Frame Generation Artifact Fix
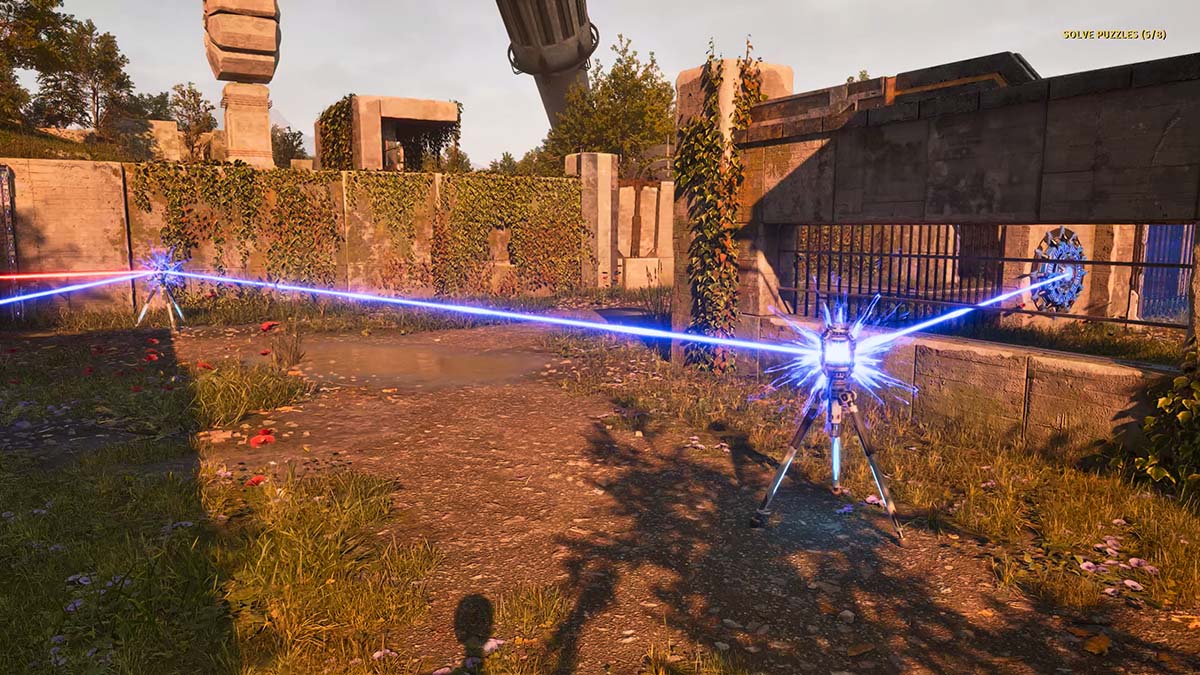
Now that the hard part is out of the way, you can go pick up the Connector from earlier that was attached to the blue Transmitter. Work your way to the back wall again and attach the Connector to the Inverter, and if you look to the right, where the Progress Wheel is, there will be another blue Receiver in this room. Connect the blue Receiver to the Connector and then place the Connector on the ground so all the devices are angled in line of sight.
Once done, the Receiver will power up and drop the Energy Gate. You’re then free to walk around and access the Progress Wheel. You can now use this knowledge of self-sustaining power for other puzzles.


Published: Nov 2, 2023 11:01 am